The new type full width panel is available here- Vic
MOD
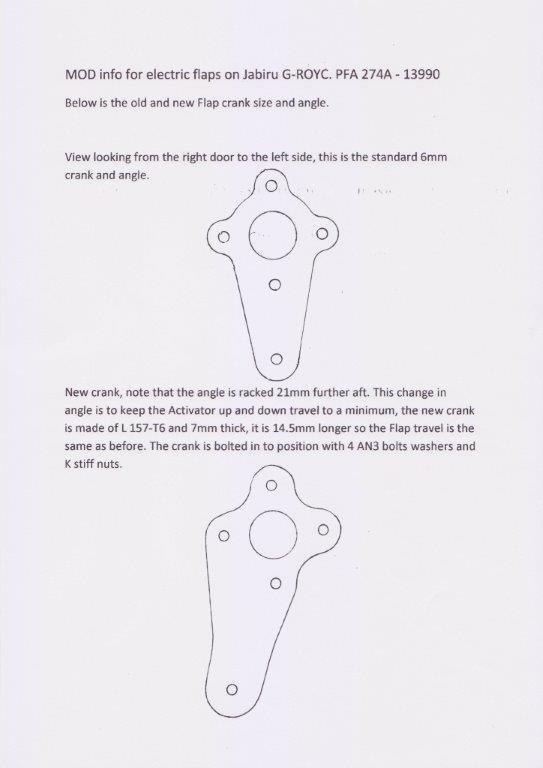
info for electric flaps on Jabiru G-ROYC. PFA 274A – 13990
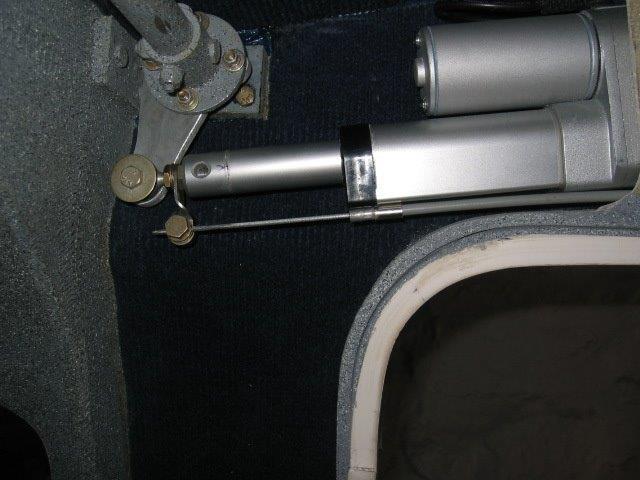
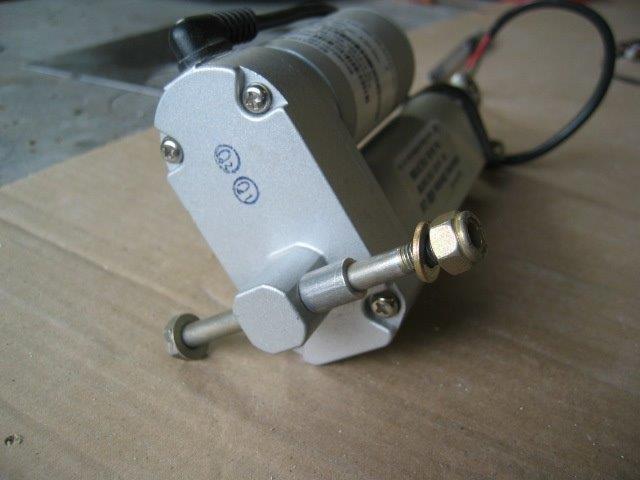
The
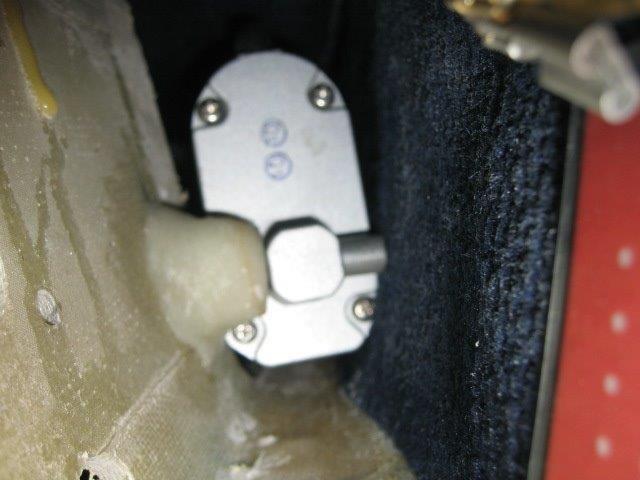
Activator is the same as the Jabiru J160, see photos etc.
The
travel is 50mm
It is
12 volts
750 N
Torque
The
gearing is 30 to 1
Speed
at full load is: 10mm / second
Speed
at no load is: 8mm / second
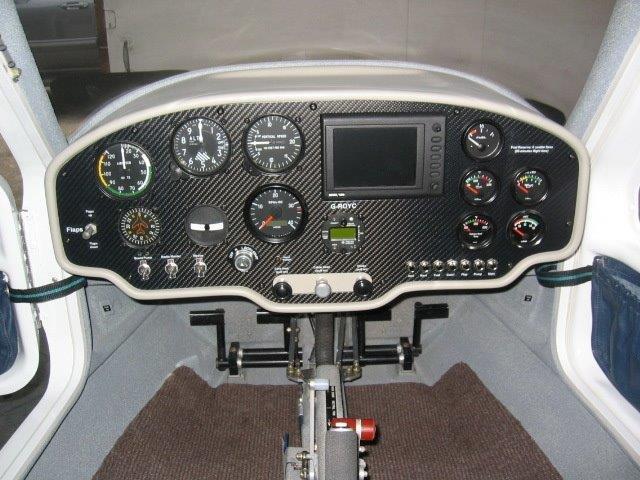
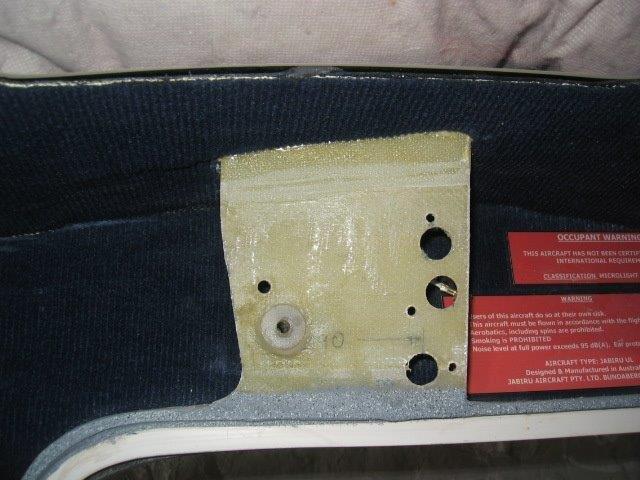
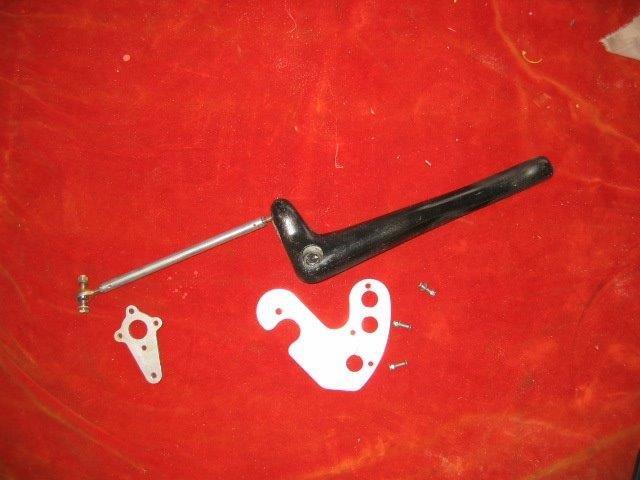
The original bearing plate for the flap handle was so well fitted and in the correct place I decided to use it, it would also enable me to revert back to the manual flaps if required. The only alteration was to remove a small angled section from the rear edge to get the activator to line up with the crank. Using flox and resin I built up a spacer to the inside (see photo) to keep the activator in the correct place and keep the fixing bolt from any flexing. The fixing bolt goes through the flap plate and cabin roof root section, there is a thick wall alloy spacer too the outer section, The fixing bolt hole was reamed out so there is no play at all, it is a very snug fit. The activating switch is on the left of the panel, it is a DPDT, off centre/ on up/ momentary on down (LAA part number D13533-1 x Tornado). the monitor is almost the same type as the J160. The total weight of the installation is 1085g the old flap set up was 345g giving a total increase in weight of 740g, not bad at all. The photos will show anything else you need to know. Regarding the weight increase, G-ROYS had the 3 section light aircraft heavy panel when I bought it. There wear two compasses and 3 fuel monitors! As well as a Transponder that had a weight of 2034g. I have fitted a single very light panel, and how have one fuel gauge + sight gauge on the fuel tank. The lightest compass was retained; no transponder. The saving in weight on the panel is 3378g.
Start
with the wings off, make up a jig so you can check and keep the top left
outer flap crank arm in the same 3 positions (probley the most important
bit) then remove the flap handle, p/p tube and alloy plate with the 3
holes. Remove the top outer flap crank arm from the main torque tube,
slide the torque tube to the right by ½ it’s length. Then drill out the
4 rivets holding the inner crank in place, slide the crank off the tube.
Make up a new crank to my drawing and speck,
and bolt in place, re fit the torque tube and outer top Flap crank
arm. I fitted a rod end bearing to the end of the activator arm it made it
longer and fitted the space better! (jabiru
do it on the latest aircraft, not on the J160) Now offer up the
Activator and check for clearance and travel This will take a while! And
will depend on the build. Make up something to clamp to the fixing plate
and lock in the activator pivot hole, you need to be able to move it
around a bit and operate the activator in its full travel (check the
outside with your jig, it must be spot on!)
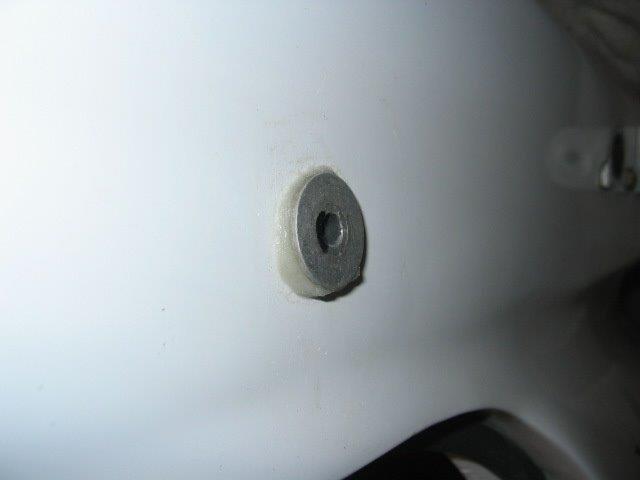
The
pivot bolt hole is set at an angle, be very careful to get it right first
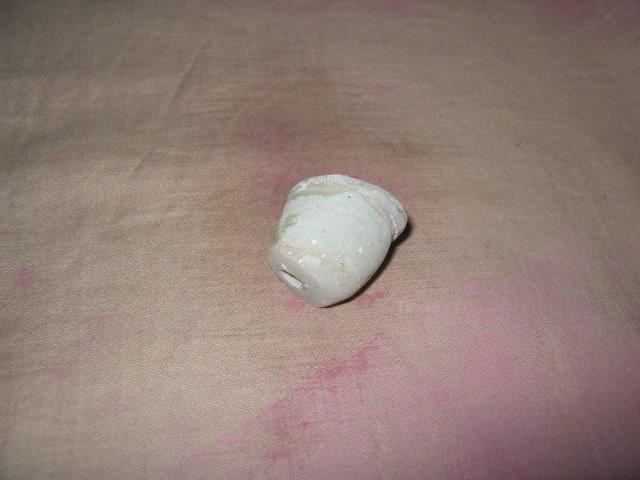
time. Then make up Flox and resin spacers to line things up (See photos)
check the travel movements all the time. The wiring is very straight
forward, from live buss bar to 4 amp barker to switch ground straight to
switch, wire so you are just switching the two wires around (use a meter
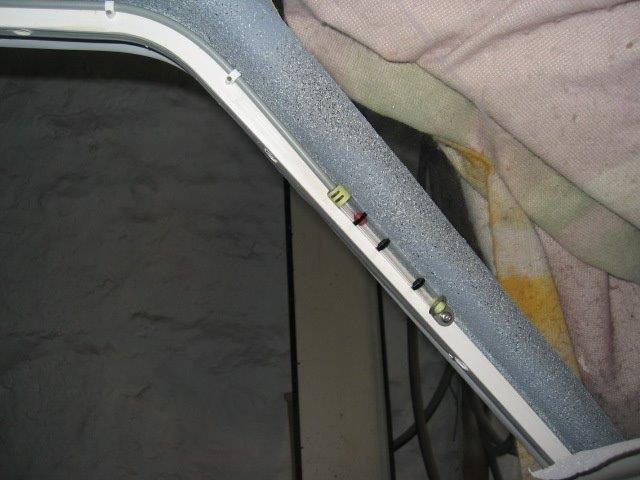
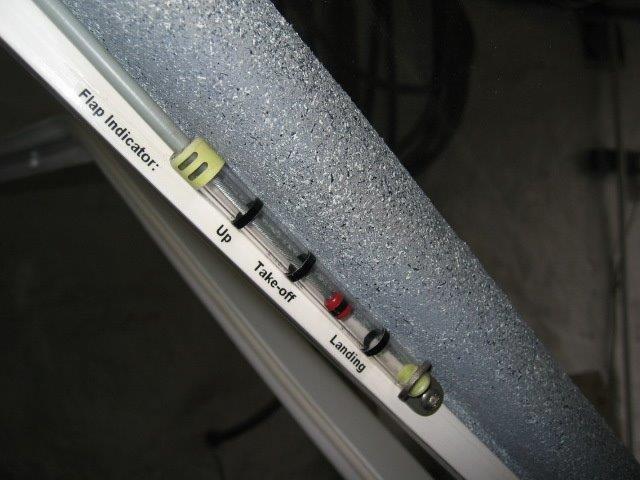
to check things as you go) Flap monitor is also very straight forward, see
photos. The clear tube for the end of the monitor is a good quality biro
with a clear body. The lower fixing is a Jabiru exhaust spring lug,
tweaked a bit!


PARTS LIST
|
Qty |
Part
No. |
Description |
Source |
|
1 |
IDM3 |
Stroke 50mm Capacity 750N 12v DC IP66 |
Industrial Divices
(GB) Ltd 143a Belle Vue Road
Shrewsbury Shropshire SY3 7NN |
|
1 |
L 157-T6 to make crank |
100mm x 50mm alloy
plate |
Skycraft. |
|
1 |
AN4 pivot bolt |
Length could depend on
the build |
LAS |
|
3
|
AN3 bolts |
Again to match the
build |
LAS |
|
1
|
D13533-1 |
DTDP off center/ on
up/ momentary on down |
LAS |
|
1 |
AN4 nylock not |
For Pivot bolt |
LAS |
|
3
|
AN3 K nuts |
For the crank arm And used to replace
the ones on the outer top crank and main torque bearing, to give
more clearance.
Will
depend on the build |
LAS |
|
1 |
RBJ337 |
Rod end bearing AN3 washers bolt and K nut
and slimAN4 locking nut to soot. |
LAS |
|
|
AN
washes as required |
Standard
and thin washers used |
LAS |